does anyone have a pic or something to help me change my impeller on a 225 ox66


does anyone have a pic or something to help me change my impeller on a 225 ox66
The below link is for a Merc, but the Yam is very similar.
http://www.bassboatcentral.com/sttips.htm
Allison XB-21 ProSport
Yamaha 250 SHO
Croxton Razor 4XL

Did you ever get your impeller changed out? I have an 02 250 ox66 and need to make the change out myself. If so, what tools did you need? Thanks!
I just did this process on my back porch for my 2002 Vmax 225 ox66. A shop with a vice would have been nice but I don't have one so I made due. I would give it a 3/10 for difficulty. This was my first time replacing an impeller or dropping a lower unit but it seemed to go very smooth. If I did it over I would pick up the plastic cone and metal ring that go on the shaft above the impeller. Mine were a little chewed up by whoever changed it out before me. I will certainly replace them next time. I took these pictures just to help me with reassembly but maybe they will give someone an idea what to expect... So far it is working well, but REALIZE THIS WAS AN AMATEUR JOB, no expert tips here!
I referenced Sherm's article as well, quite helpful: http://www.bassboatcentral.com/sttips.htm
Oh BTW the necessary items (besides the parts from Yamaha) were very basic:
Prop wrench
pliers
flat head screwdriver
sockets with extension
open ended wrench
torque wrench (nice but not absolutely necessary)
tub of marine grease
Here they are:
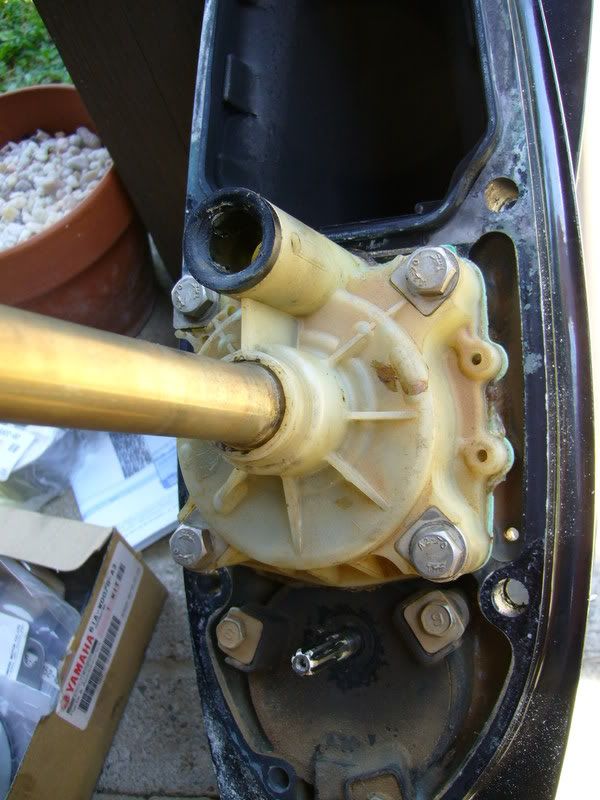
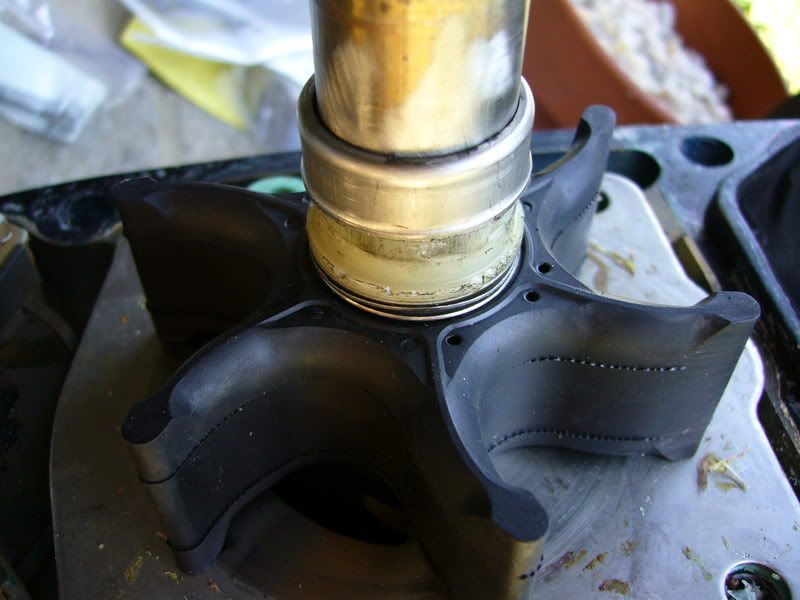
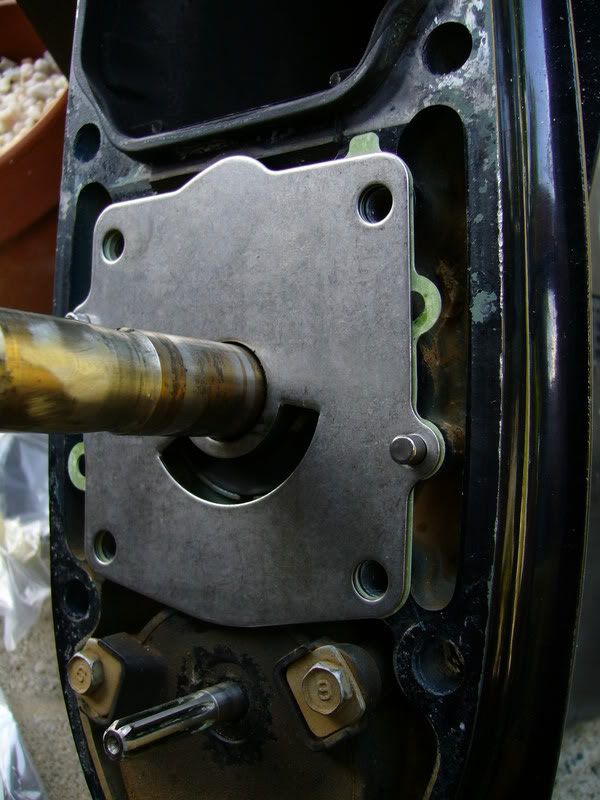
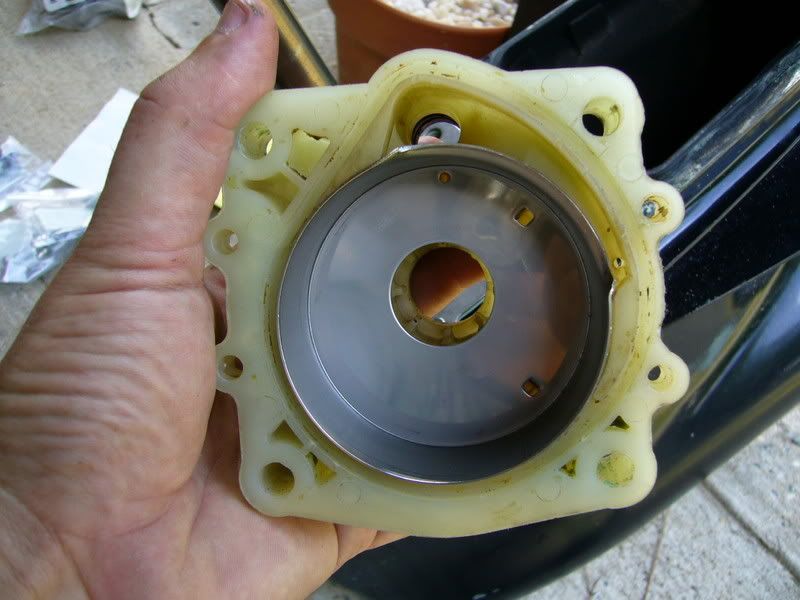
water pump housing before disassembly
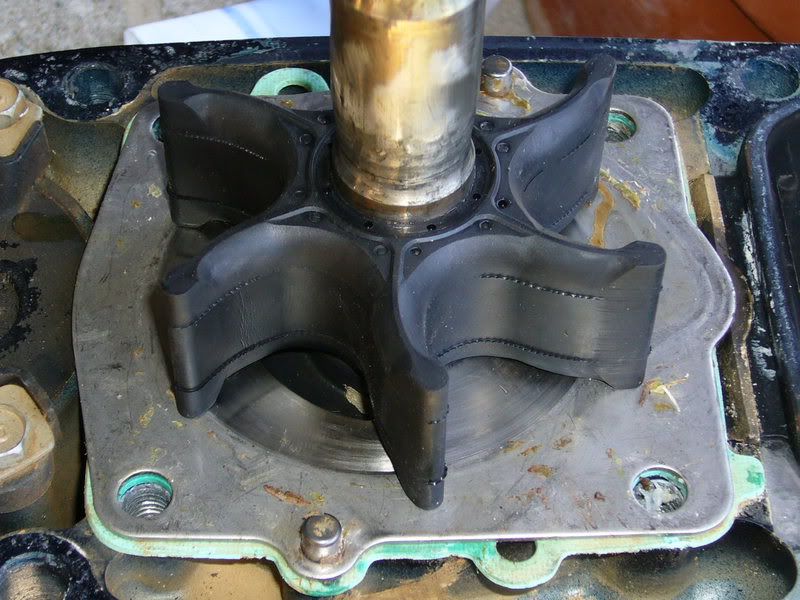
housing removed, notice heavy use of nasty sealant by previous person
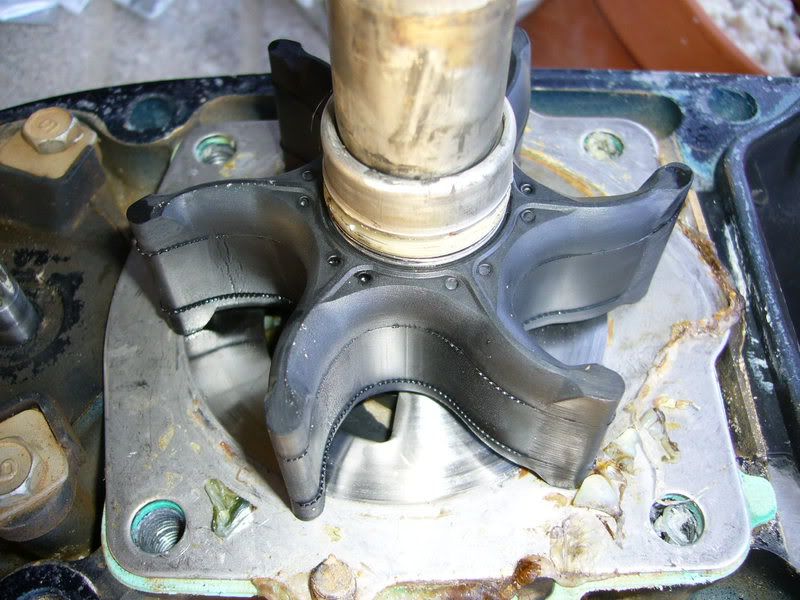
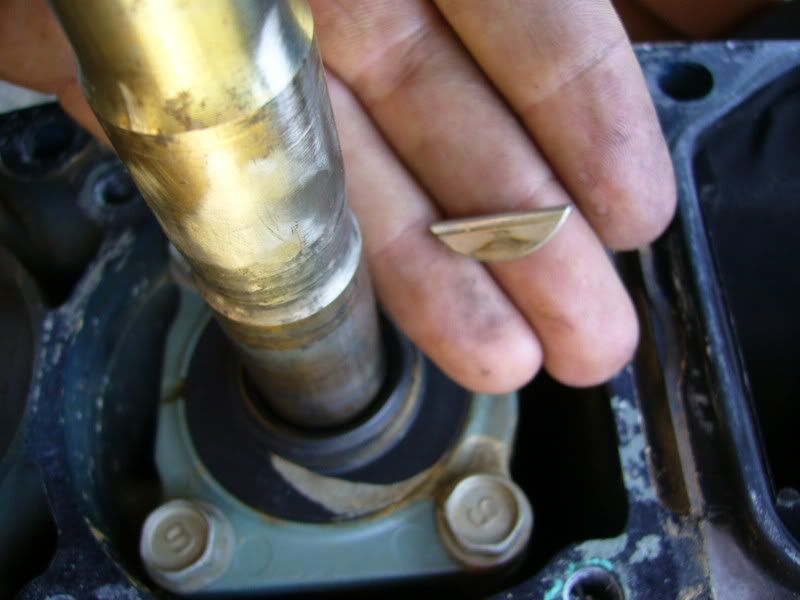
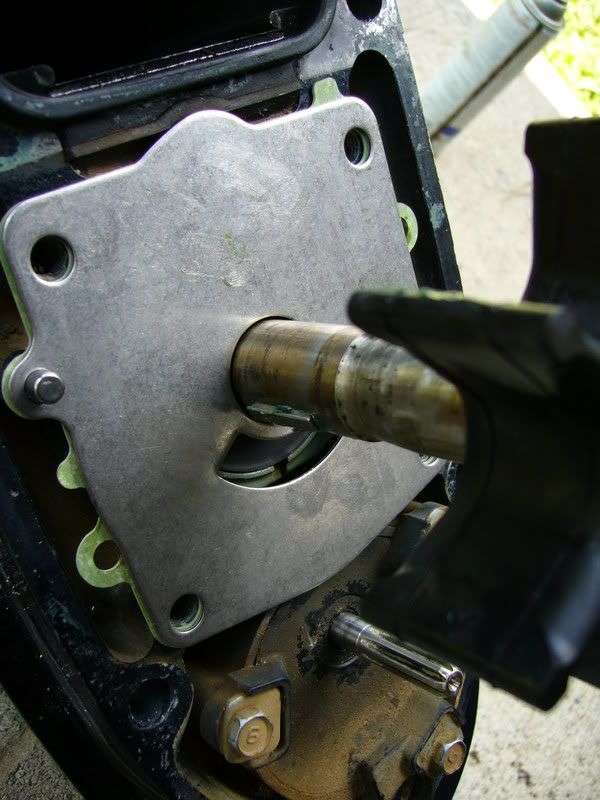
Old impeller before removal. Carefully and slowly work off the metal ring with a screwdriver by slowly working around it and prying upward.
Closer look...
Ring coming loose...
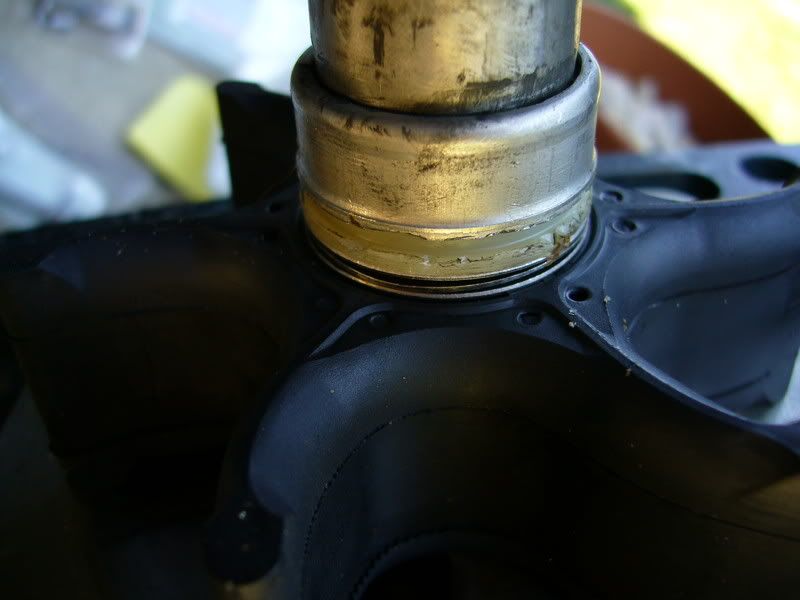
Keep the washers in order.
Impeller will slide off at this point.
These pins remove easily with a rag over some vice grips if you choose to replace them.
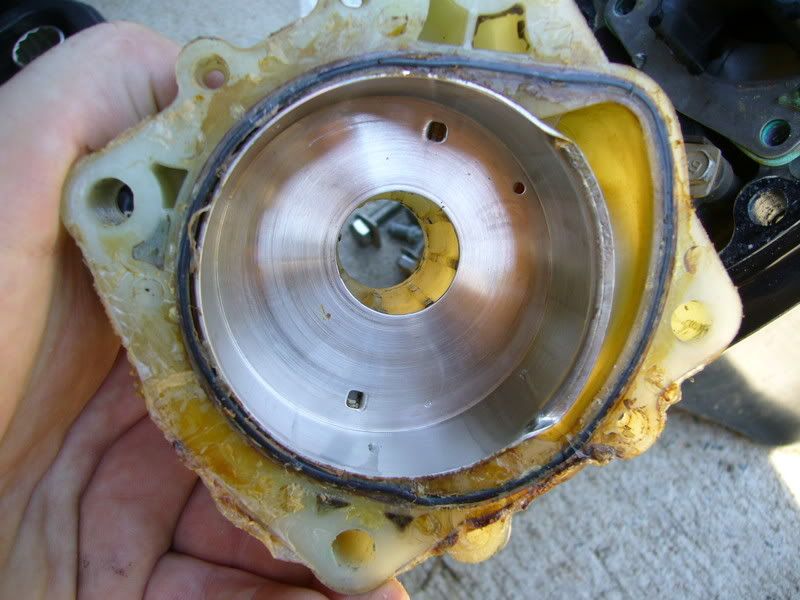
Time to clean the old gasket off this surface if you are replacing it.
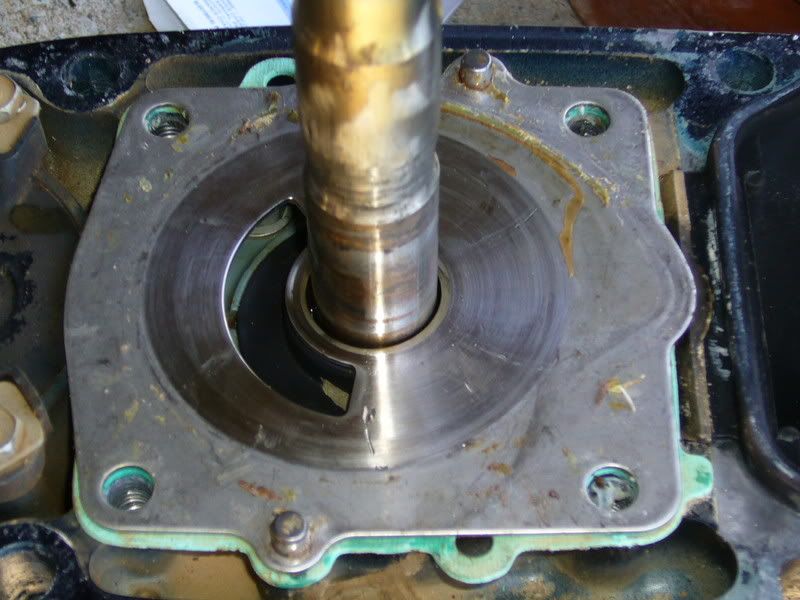
Watch for the impeller key, don't lose it!! A little grease holds it in place during reassembly.
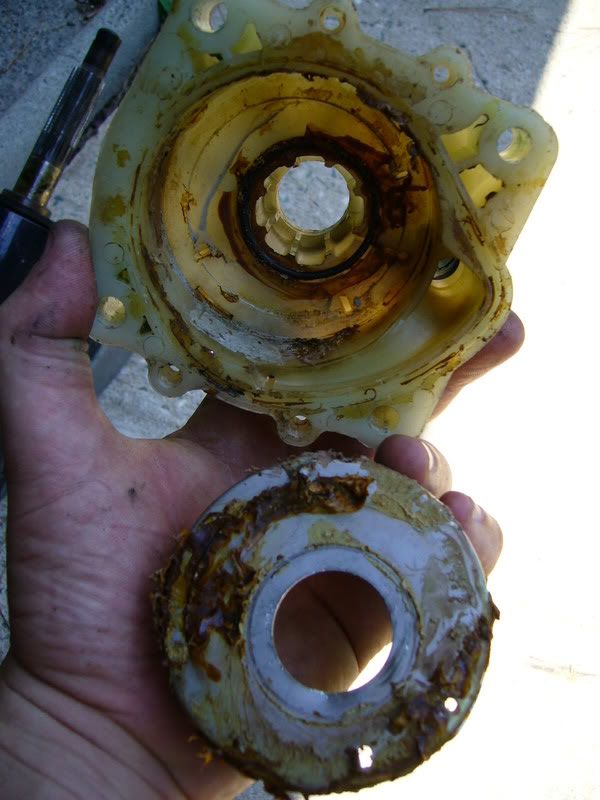
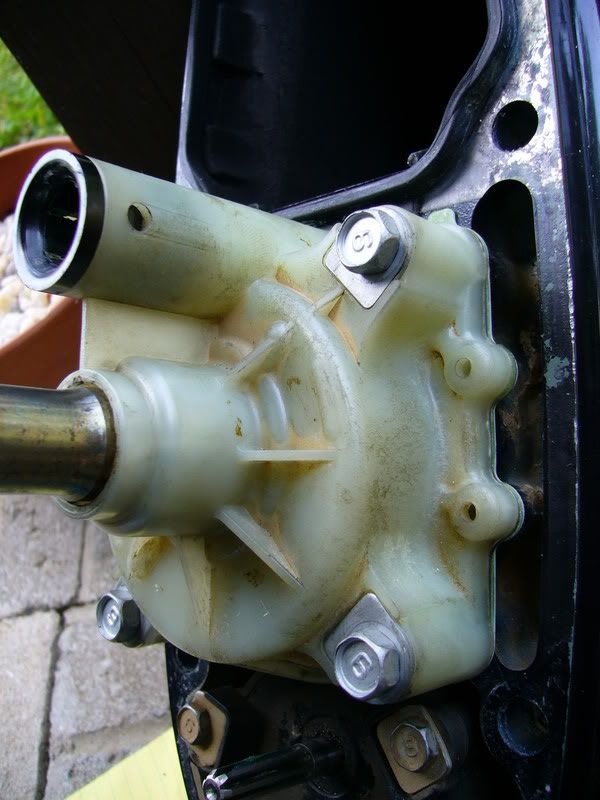
The impeller housing and water pump housing were nasty! Good thing I got new ones.
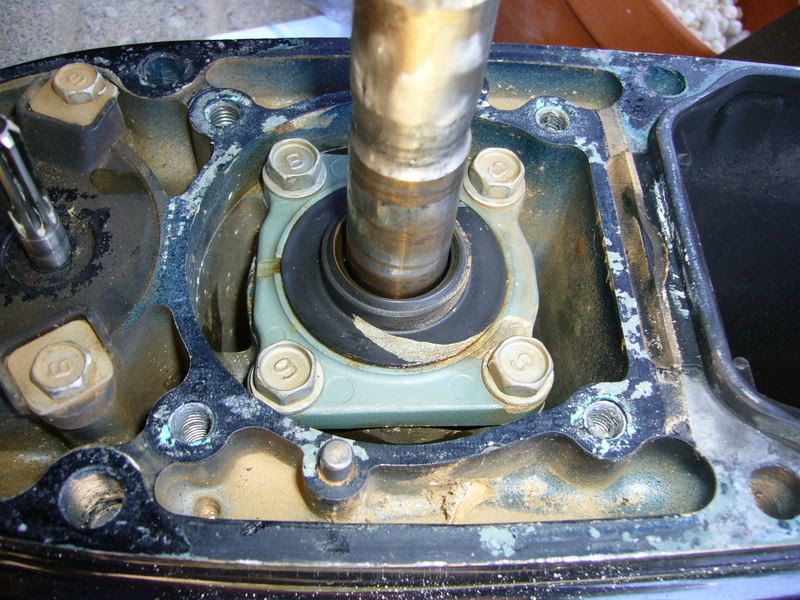
Cleaned up and going back together now.
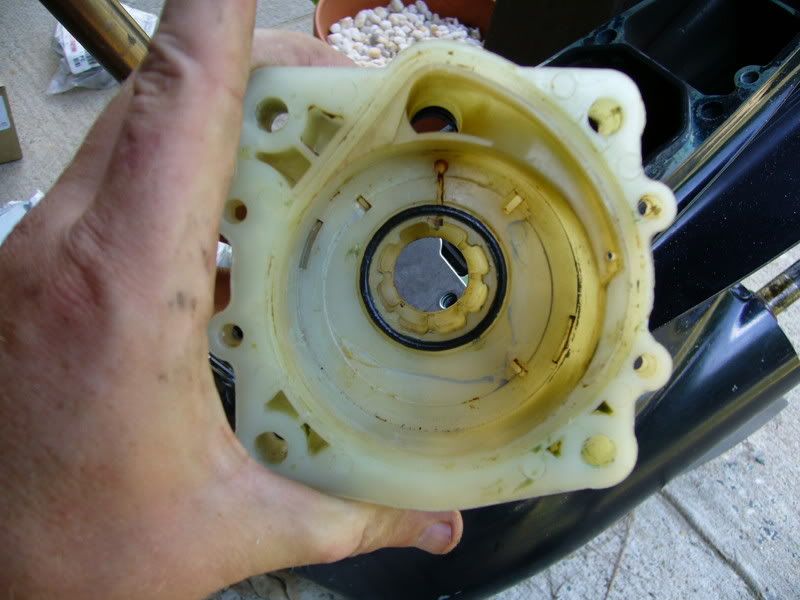
Pump housing cleaned up. Grease on the two o-rings really helps them stay in place during reassembly.
New impeller housing installed. New lightly greased o-ring went on next.
A very light bit of grease and on with the new impeller the same way the old one came off. I rotated the housing counter clockwise over the new impeller while applying pressure and it slips on quite easily this way. A very slight amount of grease on the inside of the impeller housing facilitates this process. I then reinstalled the washers then the plastic cone washer and finished by pushing the metal ring down over the plastic cone and tapping it on using a mallet with a large open ended wrench that fits around the shaft.
Torque the housing back with the new (or reused) bolts.
Modified by banditbasser at 4:39 PM 7/4/2008
Thanks for taking the time to post the process pictures! I know I need to do it too. Hopefully, it should be about the same. This post will really help. I should have done it this weekend cause the lakes are CRAZY on the holiday.
Thanks again!
Modified by reddrooster at 10:13 PM 7/4/2008
Those photos are nice and close up so the viewer can see in detail.......very nice!!!! Thanks for taking the time to do it - it really helps others that want to tackle the job.
Did you order your parts online? Or buy them locally? Thanks.
Good pics
Looks just like the one on the 115
Mike
In Memory of Michael
Fantastic Father and Loving Son
A true man at 23 years old
"What was once a great country has been mortgaged and bankrupted by the egos and ethics of career politicians."
I have a 2001 3.1 V-Max. how do you get the metal cover off the pump. Looks like it will bend up real easy. Mine is different from the above pics. Thanks
mine is a 3.1 VMAX too. The date tag is broken off the motor mount. Not sure if it's a 01 or 02. I'll be getting into it tomorrow for the 1st time. Hopefully it's not too much different from the pictures. I'll provide an update after done.

Finally got into it today. It's almost identical to the 225 motor. Here is just after I got the ring off and started removing the impeller housing.

Removing the shaft key, was a real pain to get out. We tried heating and cooling but finally latched vise grips on it and tapped it out. It was seized in place.

The impeller housing is damaged from a blown exhaust gasket.
I don't have confidence in reinstalling the same housing, so I'll bite the bullet and get a new one. Also need to replace the rubber seal behind the housing.
To be continued.....
Modified by reddrooster at 6:31 AM 8/12/2008
whnigt, If you mean the metal cup the impeller goes in, then it will bend easily but the rebuild kit came with a new one. You have to slowly work it out of the impeller housing.
I stopped by Anchor Marine today to get a new housing. Not bad...$30. The mechanic said the damage was caused by a bad exhaust gasket. It was blowing exhaust straight on the housing. That makes sence. They have ordered a replacement gasket. Hopefully, I'll get it all back together this weekend. Looks like it was only a matter of time till it failed.
Don't let yours go too long without checking it!
I have a Word document with pictures on disassembly/assembly for changing impeller on a Yamaha F200. I used it to change my 150 VMAX and it was identical. You can email me at okpacheco at yahoo.com and I will send you the file (it is 1.5M).
Modified by oep_190 at 9:18 AM 8/20/2008
While trying to install all the replacement parts, it became obvious there was a piece missing. The "Seal Damper Guide", (61A-45376-00-94). It goes where the seal is blown and provides a base for that part of the seal to rest on. Part on order.
this is my 1st time doing this and I have an issue!
I have everything back together and fired it up with the ear muffs. Water is flowing but it does not go into gear! The shifter goes forward and reverse very easy but not into gear.
What did I leave off or step did I miss???
Did you mess with this or move it by accident?? I believe this what controls putting it in gear.
Did you move the shifter while you had the lower unit off? Somehow it sounds like that shift gear is not lining up for you.
Thanks for the quick responce!
I didn't move either that I know of but that probablyis it. I'm taking everything apart again.
How do you know it's lined up?
Modified by reddrooster at 5:58 AM 8/30/2008
that was it. The part that he circled was not in it's counter part(tube). The tube moves around and you have to be sure it lines up. Going back together now.


 Reply With Quote