Page 1 of 2 12 LastLast
Results 1 to 20 of 39
  1. #1
    Member
    Join Date
    Jan 2009
    Location
    Lawrence
    Posts
    30

    1977 Ouachita Spirit Deck Rebuild (updated 2-10-09)

    This is my first boat. I bought it from a friend I used to fish with as a kid. It needs some work, but I am up for it. The engine runs like a top, and it is paid for, WOOHOO! I brought it home in October, just in time to take it out a couple of times. I have been working on it in my garage since. I will follow up with the work I am doing in the near future. If you guys have any pictures of an Ouachita like this one post them here!! I can't find any information on this boat anywhere.


    Modified by jeffsav at 6:49 AM 2/11/2009

  2. Banned
    Join Date
    Dec 2005
    Location
    Lake St. Louis, MO
    Posts
    10,632
    #2

    Re: 1977 Ouachita Spirit PICS!!! (jeffsav)

    I had a hard time finding info on my Ouachita, as well. Although mine's made of a different material , here she is. Completed it last summer.
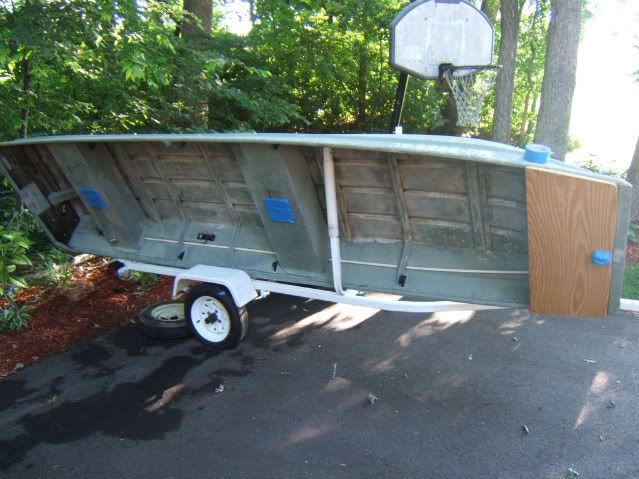
    I couldn't find decals any longer. You may want to check with Crazy Elvis or Darryl (IGS65) to have some made. Good luck with your restore. Keep us posted with pics.


  3. Member cart7's Avatar
    Join Date
    Sep 2004
    Location
    Arnold, missouri
    Posts
    6,486
    #3

    Re: 1977 Ouachita Spirit PICS!!! (jeffsav)

    That's a blast from the past.

    A guy in a bass club I used to belong to many years ago had one of those spirits. His was blue and white. Quachita isn't even on Nada any more. I seem to recall they went out of the bass boat biz around 1980 or so. Nice condition boat though.

  4. Member
    Join Date
    Jan 2009
    Location
    Lawrence
    Posts
    30
    #4

    Re: 1977 Ouachita Spirit PICS!!! (cart7)

    Here are some pics of the work I have done:

    Bilge floor rotted out so I cut out the rot, replaced the foam, plywood, and laid spandex on top with fiberglass resin.
    I also rewired the boat. I added a terminal strip above the bilge and live well pumps for easy swap out.

    I relocated the batteries to free up space, and move weight forward a little bit. They were in the rear of each corner of the bilge area. I placed a rubber floormat under them to allow airlow under the batteries, keep them in place, and cushion them as well.
    I have also removed a good sized portion of the front casting deck. The seat mount was collapsing, since the plywood under the deck had rotted out. I discovered a rotten floor under the deck, so I cut it out, laid automotive carpet in the recess of the cutout, soaked it in resin, put plyood over that while wet, and then a final layer of carpet soaked in resin....it's very strong now.
    I want to put in a hatch to go over the hole, and mount the seat to it. I plan on adding a layer of 1/4 or 1/2 inch plywood over the deck, to add some strength and allow me to flush the lid in. I put a stereo in over the course of a couple of days...I will post pics in the near future.

  5. Banned
    Join Date
    Dec 2005
    Location
    Lake St. Louis, MO
    Posts
    10,632
    #5

    Re: 1977 Ouachita Spirit PICS!!! (jeffsav)

    Hey jeff,
    My brother-in-law has a brochure of these boats. I sent him the link to this post. I'm sure he'll post a response

  6. Member
    Join Date
    Jan 2009
    Location
    Lawrence
    Posts
    30
    #6

    Re: 1977 Ouachita Spirit PICS!!! (Tom in Stl)

    Thank you Tom! I really apriciate that!

  7. Member
    Join Date
    Jan 2009
    Location
    Wentzville, MO
    Posts
    3
    #7

    Re: 1977 Ouachita Spirit PICS!!! (jeffsav)

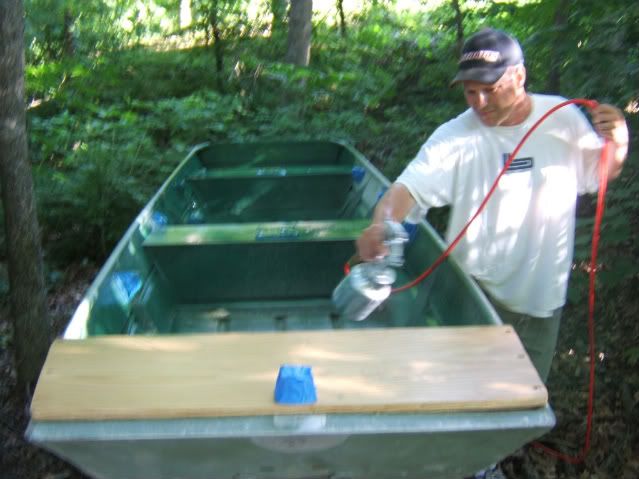
    Yup. I do have an old brochure of the Ouachita boats. My dad gave it to me when Tom and I painted that Ouachita jon boat. Mostly has pics of the fiberglass bass boats. I will try to scan some of the pages for you in the coming days.

  8. Banned
    Join Date
    Dec 2005
    Location
    Lake St. Louis, MO
    Posts
    10,632
    #8

    Re: 1977 Ouachita Spirit PICS!!! (BellyBoat)

    such a kind feller, you are

  9. Member
    Join Date
    Jan 2009
    Location
    Lawrence
    Posts
    30
    #9

    Re: 1977 Ouachita Spirit PICS!!! (Tom in Stl)

    You got me chomping at the bit! Thank you ahead of time for putting those scans up!!

  10. Banned
    Join Date
    Dec 2005
    Location
    Lake St. Louis, MO
    Posts
    10,632
    #10

    Re: 1977 Ouachita Spirit PICS!!! (jeffsav)

    Ha! I'll call him this morning and tell hime to get off his butt.
    It's a cool brochure.

  11. Member
    Join Date
    Jan 2009
    Location
    Lawrence
    Posts
    30
    #11

    Re: 1977 Ouachita Spirit PICS!!! (Tom in Stl)

    Here are some more pics:
    Scraping the rubber backing/glue from front deck...ugh.


    Wiring under the console redone...power distribution blocks with 8ga. power wire from battery.

    Switch panel and radio wiring


    I have also installed a new stereo!! CHEAP CHEAP CHEAP (under 100 buck$)
    Drivers speaker

    Passenger speaker

    Left casting deck

    Right casting deck

    8" Bazooka subwoofer under steering console(before all wiring was completed, excuse hanging wires plz!)

  12. Banned
    Join Date
    Dec 2005
    Location
    Lake St. Louis, MO
    Posts
    10,632
    #12

    Re: 1977 Ouachita Spirit PICS!!! (jeffsav)

    Hey Jeff,
    I talked to my jerk brother in law. He said he would try to scan your brochure this week. I know he has to go to Dallas some time this week. Please be patient, ha! I know you haven't asked but I just wanted to update you.

    He knows he has to do it and feels bad he hasn't gotten to it yet.

  13. Member
    Join Date
    Jan 2009
    Location
    Lawrence
    Posts
    30
    #13

    Re: 1977 Ouachita Spirit PICS!!! (Tom in Stl)

    OK. Thanks for keeping it alive!

  14. Member
    Join Date
    Jan 2009
    Location
    Lawrence
    Posts
    30
    #14

    Re: 1977 Ouachita Spirit PICS!!! (jeffsav)

    I have some updated pictures for you all. I have made some progress on the casting deck. I have dreaded this part, knowing how much it would take to get it done.

    When I cut out the rotted plywood from the deck, I was not careful to outline a square hole. In hindsight...I should have. I needed to build a frame to 1)make a square opening for the lid, 2)beef up the support structure of the deck. I made this frame to attach from the underside of the fiberglass deck.


    Once I coated the frame with resin top and bottom, I cut out carpet to be a gap-filler material between my frame and the underside of the deck, which is not perfectly flat. I soaked the carpet in resin, and perimeter screwed it to the deck. This gave more surface area contact for a stronger hold.


    I then added a layer of fleece, soaked in resin, on top of the carpet inside the cutout on the fiberglass to flush the new cutout frame to the top of the deck.


    Next I used denim material I had laying around to make a pattern to cut a 3/8 plywood deck to go on top of the fiberglass deck. I wanted strength beyond what the original deck was going to give me.


    I coated the top and bottom and perimeter of the plywood with resin.


    After making sure it fit, I pre-drilled a bunch of screws to help clamp the plywood to the deck when I applied resin for adhesive. I had my six year old mark all my holes with a green sharpie so I would not forget where they all were. He liked that. You will also see a black plastic trim piece that I made at the front of the deck that covers up three holes that used to have wood, metal plates covering them.


    After applying resin to the fiberglass deck, I placed the plywood over the deck and screwed it down, the help the resin spread between the two layers. Once I got the screws in, I used fiberglass putty to flusk the screw heads, and then put resin over the top of the deck to give a nice solid seal to the deck after all the sanding and filling. I also put putty in the opening to fill all gaps and voids, sanded, and resined.


    My helpers!


  15. Member
    Join Date
    Jan 2009
    Location
    Lawrence
    Posts
    30
    #15
    I just found this on eBay. It is an Ouachita, but it is called a Roughneck XL...anyone heard of this?
    http://cgi.ebay.com/ebaymotors...39451

  16. Member
    Join Date
    Jan 2009
    Location
    Lawrence
    Posts
    30
    #16

    Re: (jeffsav)

    Well, I have come to a stopping point in my project. I am ready to go on the water as soon as weather and work permit. I spent these last couple of days finishing the casting deck. I am pleased with how it turned out. I have more to do to this boat, but I will be using for a while before I start my next round of improvements. Here are some more pictures, I hope you enjoy them as much as I have enjoyed making them.

    I carpeted the deck, what a chore that was. I hope I don't have to do it again for a couple of years.


    Next, I began constructing the hatch lid. This lid has been the most daunting part of this whole build. In all my research, I have not seen anyone put a seat mount on a hatch lid. I know why, because it is very difficult to make it strong enough to take the torgue loads of a person sitting on it! Here is the beginning of the plate for the lid. It is 7/8" plywood and 3/8" plywood glued and screwed. I traced the seat mount on the 3/8" piece and jigsawed it out before attaching it to the thicker piece of plywood. Next I applied putty to the screw heads, sanded, and applied resin to the plate.

    To add a little more thickness I put on a layer of fleece material, and soaked it with resin. This would allow the whole assembly to sit flush with the carpeted deck. Then I put the mount in the plate, and resined the plate to the wood assembly. I really want strength and water resistance, and I got it.


    Modified by jeffsav at 6:26 PM 2/11/2009


    Modified by jeffsav at 9:07 PM 2/12/2009

  17. Member
    Join Date
    Jan 2009
    Location
    Lawrence
    Posts
    30
    #17

    Re: (jeffsav)

    There is a six picture limit per post, so here is the next round.

    After applying the resin, I carpeted the lid, and screwed the hinges on...done.


  18. Member
    Join Date
    Jan 2009
    Location
    Lawrence
    Posts
    30
    #18

    Re: (jeffsav)

    I took the boat out today....chilly(52 outside, 41 water). The boat feels very solid, and runs really well, even though I didn't open the vent on the gas can cap....geeez. GPS said it did 32mph, got up on plane at 15mph. I won't be challenging anyone to a race anytime soon.
    Here are a few pics of the bilge since I cleaned it up.

    Gas cans bungeed together


    The fuel line is attached to the underside of the bilge deck, with the primer bulb hanging slightly down for easy reach.

    All wiring is secured out of the way. The batteries are easily removed.

  19. Member
    Join Date
    Jan 2009
    Location
    Lawrence
    Posts
    30
    #19

    Re: (jeffsav)

    I got out on the water again yesterday. I have cleaned up the leading edge of my SS prop with a file and some 120 grit sandpaper, just removing some minor nicks. I also bent my cavitation plate back into a straight line. It looked as though it had hit something in it's past, and had a hump near the back end of the fin on one side. It also had a crack at the tail end...JBweld to the rescue.
    I took a buddy of mine out with me, and opened the gas vent cap...fool me once...
    I had the GPS with me, and this time I got a WOT of 37!! a 5mph gain from what, exactly? Cleaning up the prop/cavitation plate, or opening the vent, or both? I'll take it regardless.
    I have worked on the trailer a little bit. The guide bunks were looking very bad, so I removed them. I moved the front bunk bracket from in front of the fender to the rear of the fender so both brackets on each side are about 18 inches apart. I cut a 36" treated 2x4 and carpeted itand bolted it on both sides. The trailer looks better, there is more room in my garage, and the boat loads very nicely onto the trailer! I am really loving having this boat! I will get some pics out on the water when I can remember to take pictures while I am out...I get so caught up with actually being out there, I forget to take pictures.

  20. Member
    Join Date
    Jan 2009
    Location
    Lawrence
    Posts
    30
    #20

    Re: (jeffsav)

    Here are some pictures of the boat since I took it out on the water. FUN, but cold...


Page 1 of 2 12 LastLast

Similar Threads

  1. Getting in the Christmas Spirit
    By nightbasser in forum Phoenix Boats
    Replies: 6
    Last Post: 12-28-2011, 04:40 PM
  2. In the spirit of Halloween............
    By WarEagle24 in forum Rod Building & Tackle Making
    Replies: 3
    Last Post: 10-27-2011, 08:29 AM
  3. Just a Few sunrise pics from Lake Ouachita this Morn
    By BigSteve1967 in forum Shutterbug Forum
    Replies: 5
    Last Post: 09-09-2010, 07:24 PM
  4. Replies: 1
    Last Post: 12-14-2006, 06:21 PM
  5. 1977 Procraft rebuild finished pics
    By Liemavick in forum Bassboat Restoration
    Replies: 6
    Last Post: 03-21-2005, 02:59 PM