double post


double post
Last edited by DPI; 02-07-2017 at 07:32 AM.

Originally Posted by DPI

Looks great! Your work looks better than mine. I honestly don't know if it would be possible to find another tin boat the same size that has this much dang carpet. I like the padding under my feet, but my next rig may be sprayed.
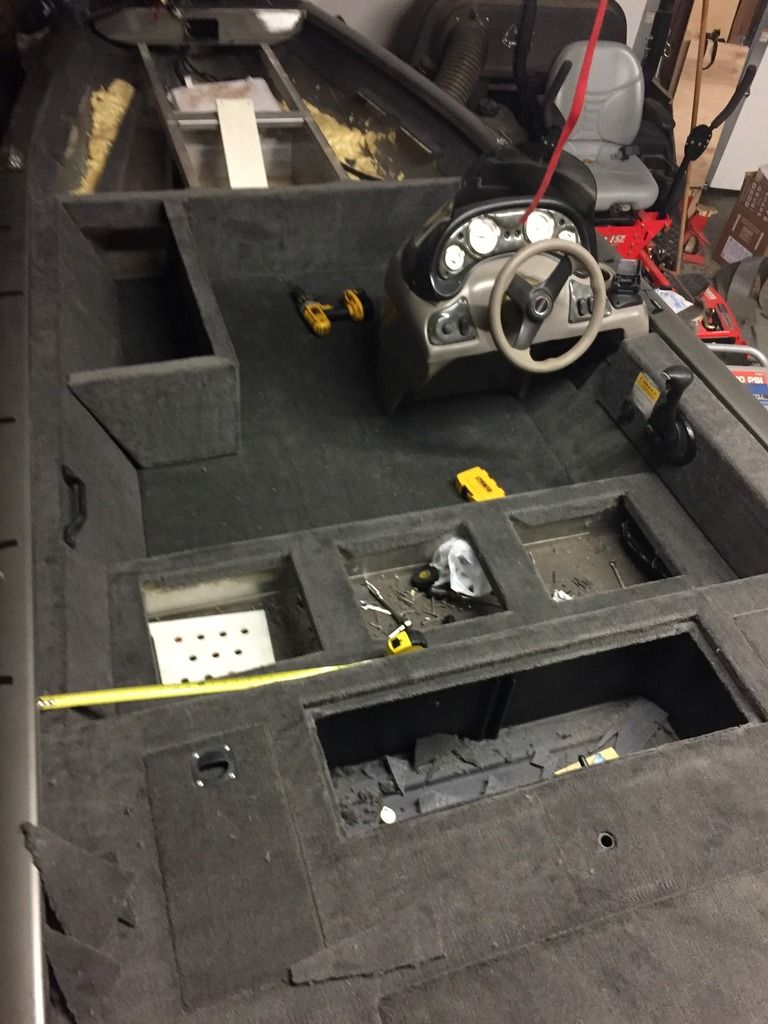
I don't know if Im going to have enough carpet either and Im currently at 1.5 gallons of glue used and Im pretty sure I will need another gallon. I knocked out the big pieces first except the front deck. I thought it was down hill from there until I started figuring on doing the interior AND exterior pieces of the front storage and the rod box and then it adds up quick. Im rushing to try and get done so I can get on the water. Even by myself, a 3 year old and limited time, I still didn't think it would take this long to knock it out.
Feel free to post more pics in this thread as you go as I could use the extra motivation!
That color with the red looks great.
Last edited by Hammmerhead; 02-07-2017 at 12:20 AM.
I'm with you, my next boat will likely not have carpet. I had little idea what I was getting into either. It took just a few hours to remove everything from the boat. However, installing everything will likely take 30-50 hours. I already have about 10 hours in that deck, but I think it will be the hardest because of the number of cuts from one piece of carpet and having to climb around on the boat to make the cuts. I think you are right about the shear number of interior and storage pieces, it is ridiculous!
Do you have any pictures of the controls and the panels that cover the cables running from the motor? I should have taken better pictures.
Did you replace the plywood in the deck?
Oh, I would cut out and replace that wet piece of foam. You can get the blue or pink foam in sheets from Lowes or Home Depot and cut it to fit. This way you are not messing with spray or pour in foam.
This is some feedback I got from another forum:
I am glad I found your post, it has already helped me with my project. Yours is looking good, keep up the good work and keep posting pictures!
I'm still contemplating replacing the front deck wood. Its in pretty good shape. It being marine ply, I will probably just use it again. Heck with all the bracing in the floor and deck being so close, things are very sturdy. My control panel is partially done, just have to glue the edges. I should have some updates later this week, just dont want the pics to be repetitive.
I priced 3/4" marine plywood locally and the cheapest I found it was $85 per sheet. The was at M&M Lumber in Tulsa. I am debating on using aluminum for the flooring. Like you said, it has substantial floor trussing, so a thinner gauge can possibly be used. Any thoughts about using the aluminum?

Not familiar with this boat, so pardon the question: Why the cutout there? Is that opening covered, or left open to slide rods into the port rod-box?Got the rod locker opening cut out as well
Also, from the pics it appears that false wall in the port rod box eats up some valuable rod storage space! Might be worth looking at modifying or removing it to gain more rod box width...?
This hull is 13 years old and has spent a day or three outside getting wet. The wood I'm guessing is 75% or so of its original condition. I get the whole "no rot," no wood construction of new boats as the new standard and its what I would want If I was buying new. However, a wood deck feels solid to me and is quiet. Its also easier to mount rod straps, Ram mounts, etc, but its not like you're swapping those around all the time. I found some Marine grade ply at Lowes for $75 a sheet, but it doesn't appear to be treated. Its a lot lighter than standard pressure treated ply, but the need to cut it, seal it and then carpet it, I just figured why spend on wood when what I have is fine.
If this boat was a little longer and had a larger engine, I would probably go the extra step of changing the floor and the deck and plan on having it long term. If I have enough time to use the boat this year, I may look for something a little bigger this fall. If not, I have a low hour $5K boat that I can hit the river or any of the lakes around me and If I don't use it much, its not eating at my wallet each month while sitting in my garage.
There is a coffin style box that runs out in front of that rod cuttout opening and there is another storage box that runs across from it that extends to the right. I will have the pictures up of all of this in a couple of days. People have cut out the foam on the other side and made storage, but I'm not changing all that up in case I try and sell or trade.
Making progress, slowly but surely. Before I forget, I want to thank Steiger117, DPI and Gatorglenn from last minute part placement, to engine height adjustments, rod box mods and deck layouts and so on! Thanks guys !
An 8 foot rod will be no problem, even though 7'6" is as long as I own
7 foot Helium III shown inbound how much length there is.

Last edited by Hammmerhead; 10-24-2017 at 06:13 PM.
You're going to have to share the modifications you made. I see the bigger opening for the rod storage. What else did you modify?
Thats all I have done in the rod box so far just. I wanted to do tubes, but there just isn't enough room without pulling the foam and I need to get 8 or 10 rods in there. Im thinking about just dividing the opening with a top and bottom for the front of the box and putting handle racks somewhere in the middle of the box to save room in the rear of it for tackle.
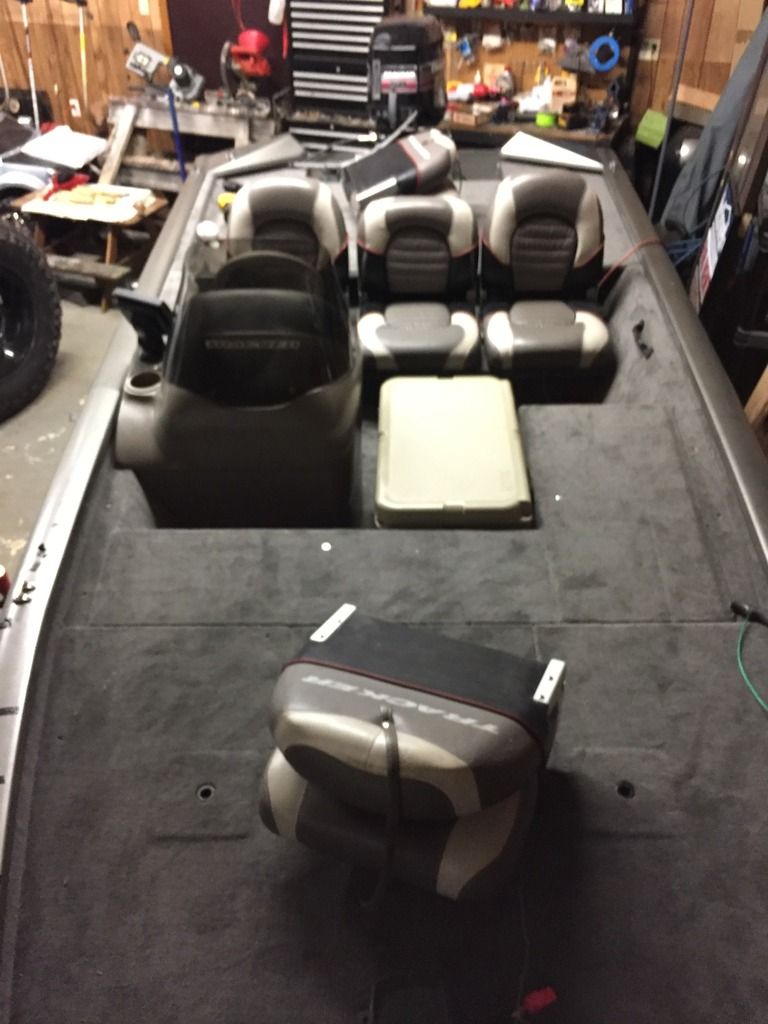
The Minn Kota charger that came with the boat was stuffed in the battery area, so I mounted it under the passenger seat and ran the wires just below the livewell, but above the bilge area. It turned out to be a great spot to mount the charger and it doesn't take up much room. Im really ready to get this carpet over and move on to the fun stuff. Its warming up again later this week so it will be a much better glue time. Im gonna try and have all the carpet done and front deck mounted by the weekend. Gonna go ahead and do a new 3/4" deck with marine ply and Im considering 3 seat bases for side by side Crappie fishing even though I don't know how much I would do that. I don't want to be stumbling on 3 bases all the time trying to Bass fish since I don't use a seat much.
Great job! Have you considered a carpeted step box for middle? That is my plan when I get it out of storage
Thanks. Definately considering steps, but I may stick my ice chest in that opening as I think its going to fit really well. If not, Im thinking about getting this, removing the hardware from the front and carpeting it.
http://www.customaluminumboxes.com/id89.html

Last edited by Hammmerhead; 02-15-2017 at 08:43 AM.
Glad i found this post, i have a red '04 like DPI and i have been wanting to install new carpet since the factory carpet is crap. Let me know final measurements of carpet that you guys used, that is my biggest concern right now is ordering enough, but not having a ton of extra. I like the mod of the rod locker, always thought the opening was a tad bit small. I was thinking about extending the front deck but have not decided on that one yet. The only other thing i plan to do differently is install a rubber mat in the under seat storage instead of carpeting, in the rare occasion i use an anchor, that is where it goes. Keep up the good work guys, and be sure to post final pictures.
*Edit* What weight carpet came from the factory? 16 or 20oz?
Last edited by kissfan4; 02-17-2017 at 10:32 AM.
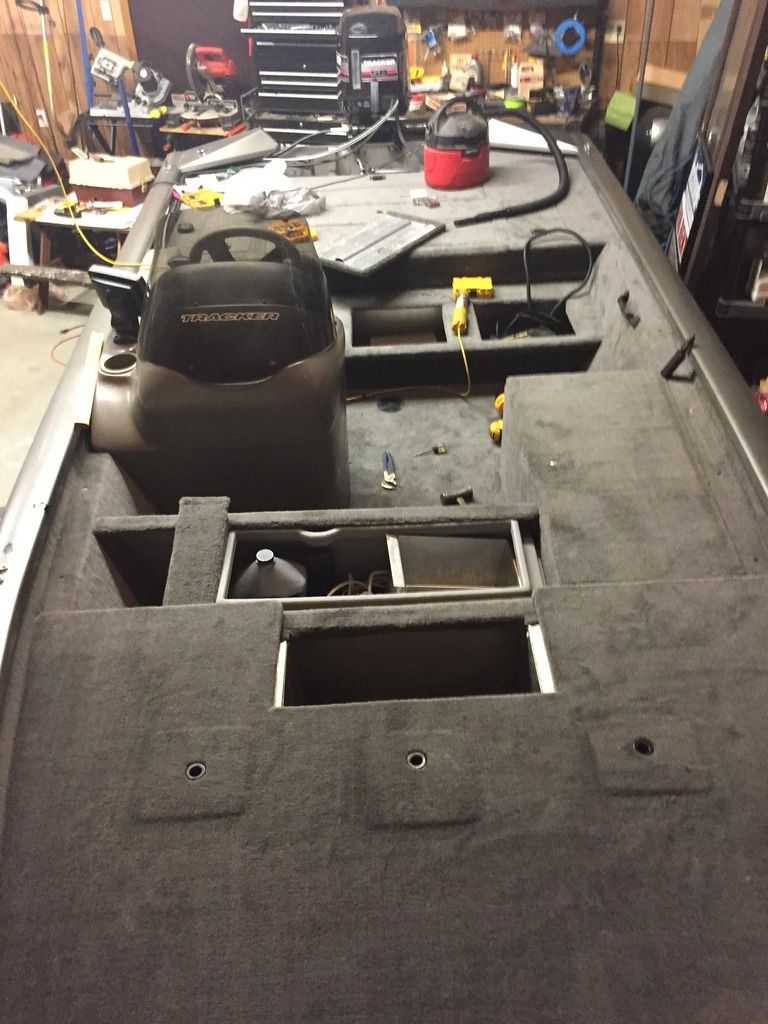
Got the new deck cut and added the outside pedestal mounts.
Edit:
I forgot to add that Lowes is having a sale on the 3/4" Marine ply for $65. Also the 3/4" is a tad thicker than what my factory 2004 deck had. Its just noticeable, but the 3/4 is rock solid. Take your time and double check the pile direction of you carpet when it comes to laying the carpet. If you're not sure, just run you hand one direction on both pieces to make sure its stays the same color. Always keep the band lines of the rubber backing running from front to the back of the boat. This may be a gimme for some, but for a carpet newb like myself, I need all the pointers I can get.
I just had to strip and re-do two deck lids from getting sloppy towards the end of it and it is much worse striping when it has good glue holding it. You couldn't tell looking from front to the back of the boat, but when you walked to the back of the boat and looked forward, it looked like I just used some different colored carpet to cover just two lids. It was that bad and had to be changed.
Getting the plastic liner in there is a little tricky because you don't have access to the bottom lag bolts for the front box panel once the liner is in there. It makes it difficult to position the top lid flush with the front panel, then pull the liner out and shoot your lags in. This liner does not bend much. Would have been better to let it sit in the sun on a 100 degree day. Then you have to cram the liner in and pop the side rivets on each side of the front panel and hope the lid still is flush. I just had to tear the box half apart to get the liner to go back in. This is a pic before it was mounted. This was an hour and half over sight on my part. Secure this front box with the liner in it before you attach the front deck! It will save you time.

Last edited by Hammmerhead; 02-24-2017 at 12:04 AM.
I think factory is 16 oz. You want 20oz. Noticeable difference in cushion.
If you are changing all the carpet inside boxes and out I think you could get by with 8.5'X 28'. I went with 8.5' X 30' and it has allowed me to make up two mistakes I made on two lids, but that is it. There is way more carpet involved in a Tracker than meets the eye.
I did the same thing. Here's an example of running the carpet different directions. I changed the orientation of the lid instead of stripping the carpet. I wanted this lid to open from inside the boat anyway. That way I can access it from the boat easier.
And after I fixed it: the pic is taken from the other side of the boat, but this gives an idea of how drastic the color changes.

Carpet is finished, finally. I got the old, faded Tracker decals off the cowl and it buffed out nice to be 13 years old. Waiting for new Merc decals to come in.
Ready to try and get the rod locker set up with a rear bracket to hold the rod butts. I wish I had cut the rod opening one inch higher (and may still do it) as I think the frame can still take it.
I'm ready to move on to electronics and a new troller, but going to have to do that in time. Right now I just want to get some fish on my new carpet.
A few pics
Im going to have to get a taller piece of angle for the small front deck lid to attach to. The deck is 3/4" which is a little thicker and it is keeping that lid a tad low on the hinge side. Not enough metal there to drill new holes and raise it. Luckily, this can be fixed without removing the deck.
Mounted charger under pass. seat and ran wires under the live well, but above the battery floor and right to the battery area. It was surprisingly easy with a fish tape.
Decals came in today
New cooler fits too
Last edited by Hammmerhead; 03-04-2017 at 10:14 PM.
Looks good, will hopefully be ordering my carpet once my samples get here.


 Reply With Quote