Place your Garmin installation images for Ranger boats in this thread
Please installation images only. If you wish to discuss please start a new thread referencing or pasting the image in new thread


Place your Garmin installation images for Ranger boats in this thread
Please installation images only. If you wish to discuss please start a new thread referencing or pasting the image in new thread

Reserved
I mounted the black box in the starboard storage locker. Remove the starboard running light and there is a wire tube that comes from the front access panel area. The only wire in this tube is for the running light. I unplugged the running lights and pulled the wires back to the front. The LiveScope transducer plug just barely fits through the tube. Then I was able to run the power and network cables through it, then ran the running light wire back. Make sure to run the transducer cable first! The network cable Garmin provides was just barely long enough to reach.
Inside the storage locker you have to remove a few inches of the spray in insulation to get to the tube.

2018 Ranger Z185
Yamaha 150 SHO w/ Tempest 23P
Ultrex 80 Link
Helix 10MDI & 12MSI G2N at console
Helix 10 M+DI G4N w/ M360 and Garmin 93 w/ LiveScope at bow
Atlas Jackplate
12' Talons
Will attempt linking my older thread:
2018 Ranger Z518
I can not take credit for the install. Got very lucky to know some Garmin folks!
Garmin 1242xsv touch units, Livescope, GT52 and UHD and GT8.
http://www.bbcboards.net/showthread.php?t=941162
Last edited by DogDoc15; 01-24-2019 at 04:58 PM. Reason: adding info
First off awesome install. I have a 518 on order and I just purchased 3 of the Garmin 93 sv and I have a few questions if you have time to reply it will be greatly appreciated. Could you let me know where you found power at bow and console, if you connected them to an accessory switch or was there a power bank you hooked them into. I like the transom transducer mount, did you mount the GT30 transducer to it that is the one I will install there and I want to know if it will fit there and did you install a shoot through transducer also. I will install the Garmin 5 port ethernet expander and plan on installing under dash where you installed the UHD box. Thanks in advance for any replies.
Good Morning Guys,
Looking to start my installation on the 93SV units. I am using the 52 Ducer for the transom. I have a 06 Ranger z20, and am looking for idea's where to mount the transducer for ultimate results. Thank you

Im going to attempt to design a bracket soon to mount the module inside your bow. I have a Ranger z20 and will make a video on my install. Video coming soon. To much snow in front of my boat storage area.
2006 Ranger Z20
2011 225hp Evinrude ETEC H.O.
26p Raker II SS prop
HDS9 gen2 at bow and HDS16 carbon on a precision sonar console bracket.
Units linked into outboard interface.
Precision sonar gauge relocation kit.
2) 8' power pole blades
101 lb 36v minn kota fortrex
Bob's 10" hydraulic jack plate
Good job on your install. I thought about that. I got a 2m network cable inside the Panoptix box. Was that long enough to reach your unit from your module location?
Originally Posted by cconn

2006 Ranger Z20
2011 225hp Evinrude ETEC H.O.
26p Raker II SS prop
HDS9 gen2 at bow and HDS16 carbon on a precision sonar console bracket.
Units linked into outboard interface.
Precision sonar gauge relocation kit.
2) 8' power pole blades
101 lb 36v minn kota fortrex
Bob's 10" hydraulic jack plate
I did the same install. It was long enough but barely.
Equipment
3 Garmin 93 sv plus with optional GT 30 / GT 8 transducers and the standard CV 52
Garmin GMS 10 Network Port Extender and optional two 6’ and 1 one 20’ data cables ( Ethernet )
Garmin Step Mount for GT 30 Transducer
Bass Boat Technologies Dual Console Mount and Single Bow Plate Mount
First I took off the console and bow plates to examine where to wire up all units which I found 4 accessory connections behind console plate and 1 at the bow. Powering up all units should be pretty easy. Next I went to run the wire fish from bow to console, there are two wire tubes do not use the one with two wires in it as it just goes to the side marker light. I got the fish tape to the console on the first try and there is a vent plate at lower console area remove that and you have room to work. I taped the 20 ‘ data cable to the fish tape and pulled to the bow and went through pretty easy. Next I installed the GT 30 to the step using silicone on screws also putting some in the drilled mounting holes which the screws did not go all the way through the glass tape off the bit the length of the screw. Next I epoxied the GT 8 in the bilge area by the pumps you have to take out the prop storage plate it has 4 screws which need a square end screw driver. Then I took off the electric panel that has the start and acc buttons to run the fish tape. The tape went back to the back and I did not try to go through any tubes, I could see the fish but could not get it as there is no room. I pulled the tape out and ran it from the stern to the console and on first try it showed up where I took electric panel off. I taped onto the fish a length of exterior wire that was flexible and pulled the fish tape back to the stern where I took the fish tape off leaving the wire in place went back the console and taped on the fish tape to the wire and pulled the wire to the back so I now have the fish tape end at the stern. I taped the transducers to the fish tape end and pulled them to the console and they went through with no problems on the first pull.
I mounted the GMS 10 to the plate that goes across and has the electric components mounted to. There is enough room you just have to be careful on where you drill for the mounting screws to stay away from the electrical components. Next I used my Fluke tester to find an active buss bar which there is one behind the console plate and wired 2 units and the GMS 10 the the bar. At first I did wire the units to the empty accessory switches but found out that when you start the outboard power is turned off to the accessory switches which would turn off units if they were on. Connected the data cables mounted the Bass Boat Tech plate then mounted units while running wires through the BBT plate hooked all up and the console area was done all working. I put the vent plate and Electric panel back on.
At the bow I mounted the CV 52 transducer and secured the cable with wire ties with electrical tape over the ties as not to tear up any skin that may touch them. Took off the plate that goes around the foot control so I could drill a hole to run the transducer cable through. Hole was drilled to the higher and forward part of the front of foot control area so no water will go through, I put plate back on and wired the Garmin unit to the accessory switch on the bow panel and ran all cables through the BBT plate connected them and unit was working.
Last edited by botrdav; 02-22-2022 at 11:25 AM.
nice install botrdav
Should help a lot of people out.
the bow plate is a great addition .
Thanks, there were a few posts that really helped me out so I am just trying to pay it forward.
Thanks for posting. I was wondering how to get the transducer cable to the console on my 2019 Z185. I even cut the collar as they sell replacements and it still didn’t fit. Going through the light was the only thing that worked. After punching a hole in the foam with a screw I was able to easily route it to the carpeted storage area. From there, it is easy to run it to the console (I have the network extension cable).
What did you attach the puck transducer with?
Quick set 2 part epoxy. Sets in 5 minutes JB Weld and Loctite are a few good choices.
botrdav, Very nice job! I really like the dual BBT mount! Not saying I don't like my precision sonar mounts. it is good to have multiple quality products available.
Thanks, the the reason I went with BBT is the way they angled them I was going to use Precision but the angle won me over.
botrdav, what are your battery plans? I am only running 2 12" units with everything else you have. I worry I may not have enough reserve with the interstate group 27 cranking battery. Maybe I am wrong though. Any thoughts?
The boat came with a group 31 agm battery for the 4 stroke motor, I have not been on the water yey but plan on doing the break in this week. I was told this battery will have plenty of juice to run all electronics hopefully they were speaking the truth.
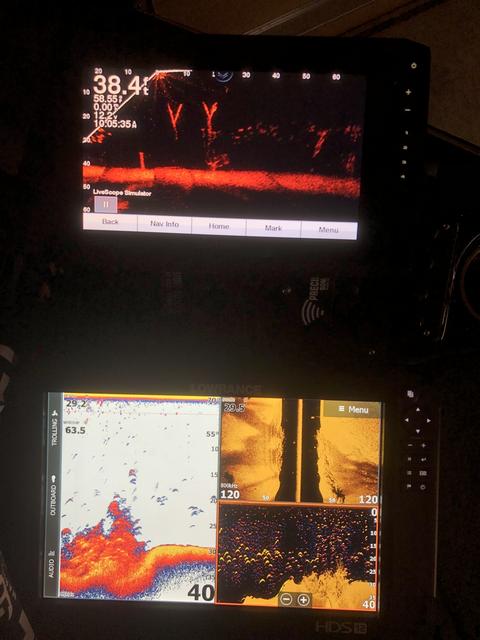
LiveScope install on Ranger Z185 with black box mounted under console.

Last edited by j791; 04-02-2019 at 09:53 AM.


 Reply With Quote