-
When you have to tie in a joint, use overlapping fiberglass tape....I can remember back in the old days alot of boats used rivits to attach the cap.....you can definately tell the difference between screws and rivits.
-
-
Member

What scully said, lap your joints with glass. itll be plenty strong. I used a total of 3 layers of 1.5 oz chopstrand mat and 3 layers of 1708. It aint going anywhere!!
Stroker 21
Mercury 250 PRO XB

TN Bluewater dealer/rep.
BBO
-
I've heard Polly resin doesn't bond well to the old layer, so with that in mind would y'all recommend using epoxy for inside the hull? There is only a few places (removing some of the through holes in the bilge and transom) that I'm going to do glass work that will be on the exterior so I can order Polly resin for those and epoxy for the inside. For some nicks and scrapes in the glass and gel what would y'all recommend to fill these areas and can be gelled over? None of these areas are bad but I want them fixed all the same. I've heard Marine Tex doesn't work well with gel. Is there a fiberglass filler that is gel friendly? Also I noticed when I removed the troller tray that there was some foam glassed into the front deck but none on the hull and unless there is some under the floor then there is no exposed foam in this boat. As a side note these boats seem to be a very light lay up but has plenty of strength where it's needed. As always thanks for all the help and keep the advise coming.
-
I would use epoxy resin from US Composites instead of poly resin....more expensive, but "stronger". I have used marinetex on cosmetic repairs and never had a bonding issue with gel....if you need a filler mix epoxy with cabosil until it is paste like
-
-
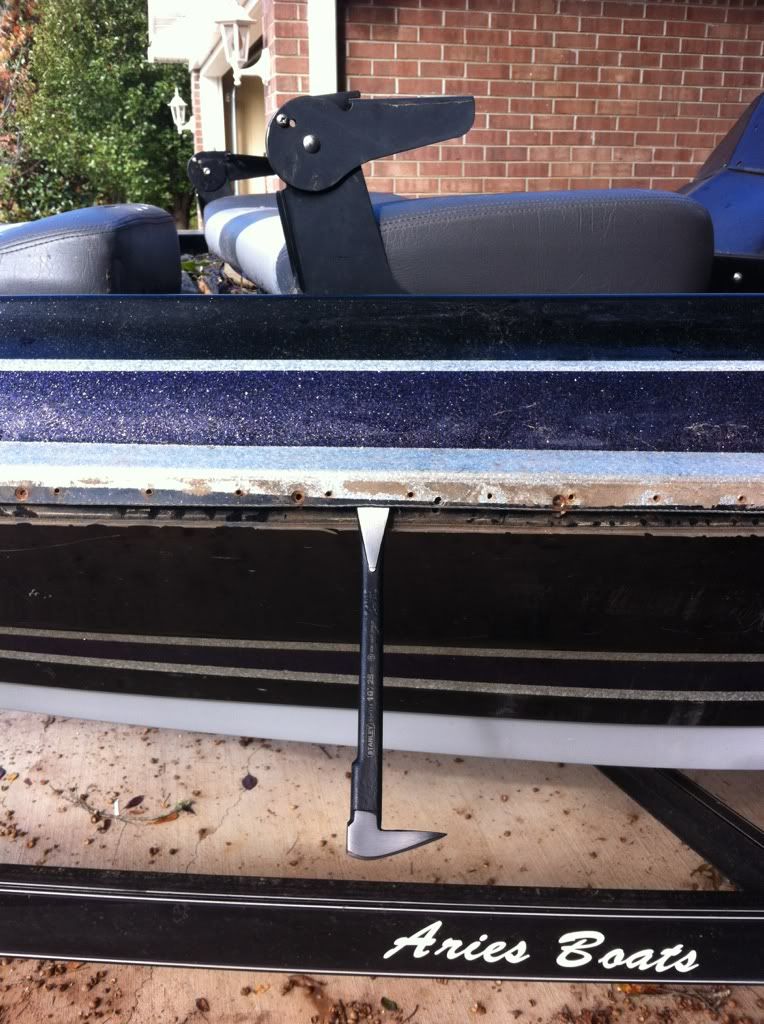
So far I've removed the steering cables and tried to remove some more of the broken screws. It looks like once I get ready to remove the cap I will just have to pull the screws through the cap and accept the damage.  If this is the only way there will be a lot of damage to repair before the cap goes back on. Well now I'm gonna get my lazy butt off the couch and pull the seat out of it and scratch my head some more about removing those screws.
-
Member

Had the same issue pulling my cap but only a few were broken there was enough play in the bottom to the top cap lip I just slid a wooden wedge to give me enough room to back the screws out with a pair of needle nose vise grips, on some the top cap lip poped off the screw so I left a wooden wedge in there for when I pulled the cap, there was only a few, or if you can get to them from the inside like On my Checkmate I reached underneath from the inside and just screwed them all the way through with chanel locks,
-
I'll try to remove them from the inside. Ill have to go through the troll tray hole in the front deck because all of the compartments are glassed in and are not removable. When I removed my seat after my last post I found that the panel my seat is mounted on is rotted and obviously the platform the seat mounts on has wood under it which is rotted also. When I pressed on the fiberglass it had a lot of flex to it so that will need to be repaired also. Well this started out as just fixing the battery platform and has turned into a full on resto. Oh well I guess that's why they are called a B.O.A.T.
-
Excellent job so far, keep up the good work and please keep posting pictures....Thanks
-
-
would they push on thru with a small punch?
-
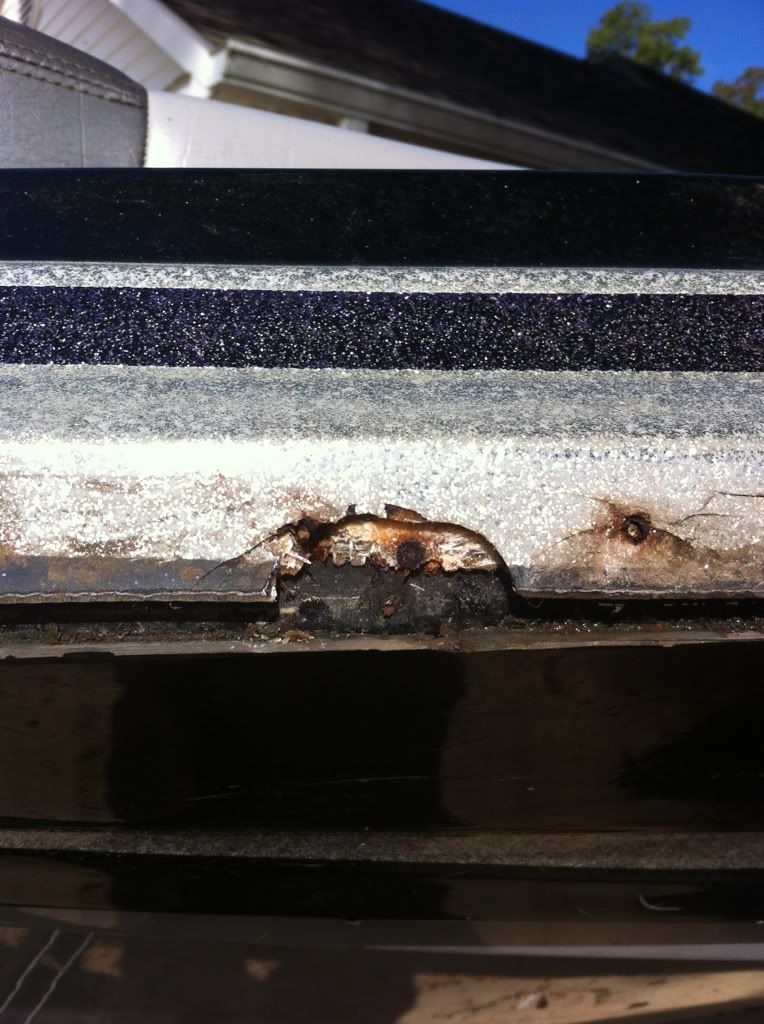
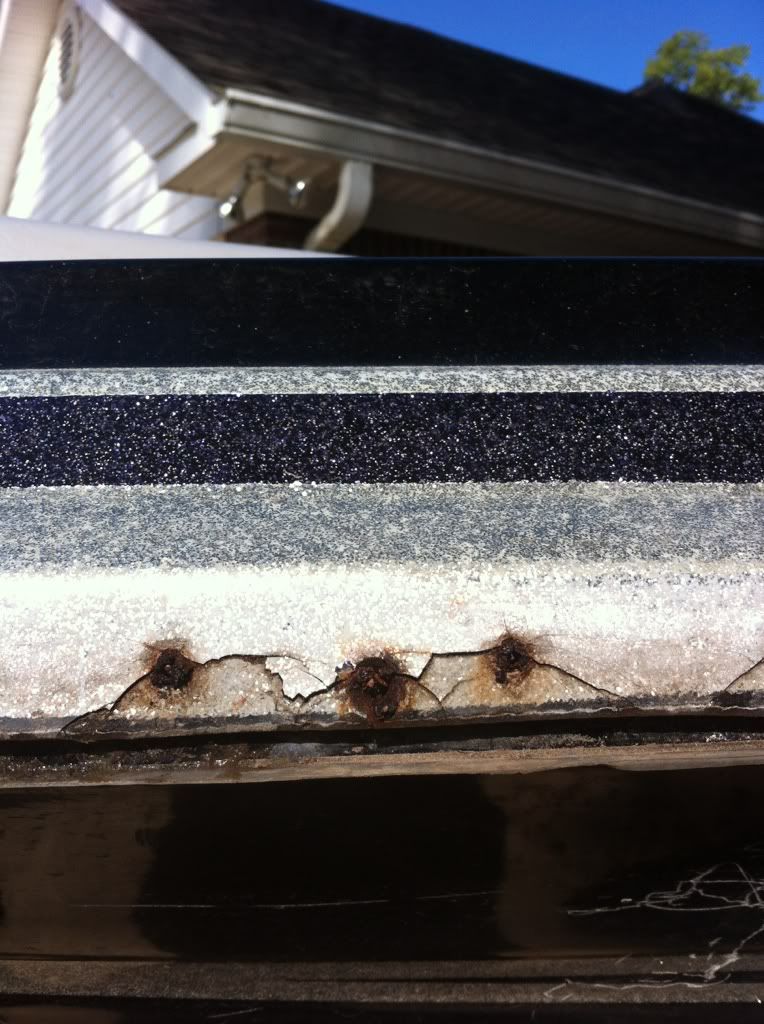
Are you sure they are screws and not rivets. Kinda looks from the photos that they may be rivets and if they are you can remove them by drilling them out.
-
No, on the inside of the hull there is a narrow strip of wood that everything is screwed into. If I try to drive them through that I would cause more damage than doing it this way I believe. I'm sure that they are not rivets I already have drilled out all of the rivets. The pics aren't the best, but I'm sure they aren't rivets.
-
Use a drill bit and drill the screw head. Make sure the bit is the same size as the screw and the head should fall off when you drill it.
Or can you get a sawzall blade in there and cut the screws?
-
Haven't tried the sawsall idea yet. I've tried drilling them with no luck they are HARD. I've even tried using a center drill and that wouldn't even cut them. Tomorrow morning when I get home I'll see if I can get the sawsall in there thanks for the idea.
-
Member
Dremel and grind the heads off, then pop the screws loose from the cap lip with a wedge/ crow bar, dont pull the heads through, saw sall is a good idea, rule of thumb dont ever cause more Damage then whats already there, fixing a few holes is easy,even if you had to make them bigger the work sets in when you have to fix that lip right.
-
Yea I'm sure that lip will be all sorts of fun to fix but those sections was already cracked when I got the rub rail off. I was going to have to fix them anyway but this is just going to be more finish work.
-
Been busy the past couple days but not on the boat. I've been getting this finished. http://www.bbcboards.net/bbc-lounge/...ete-sorta.html
-
Have you made any more progress on the boat.


After that the bow panel came out only to find out why my front nav lights wasn't working. Someone had soldered the hot wire back together but didn't cover it so that area heated up and melted the insulation on the negative wire causing a dead short.
Next I removed the trolling motor only to find the harness for it was spliced at some point. The last thing I did was remove the leads for the trolling motor. 944 here is a pic of my seat for you.
. Sorry my boat is so dirty, but the past 2 days the weather has been too nice to work in the garage and the tree over the drive way is dropping acorns like crazy.
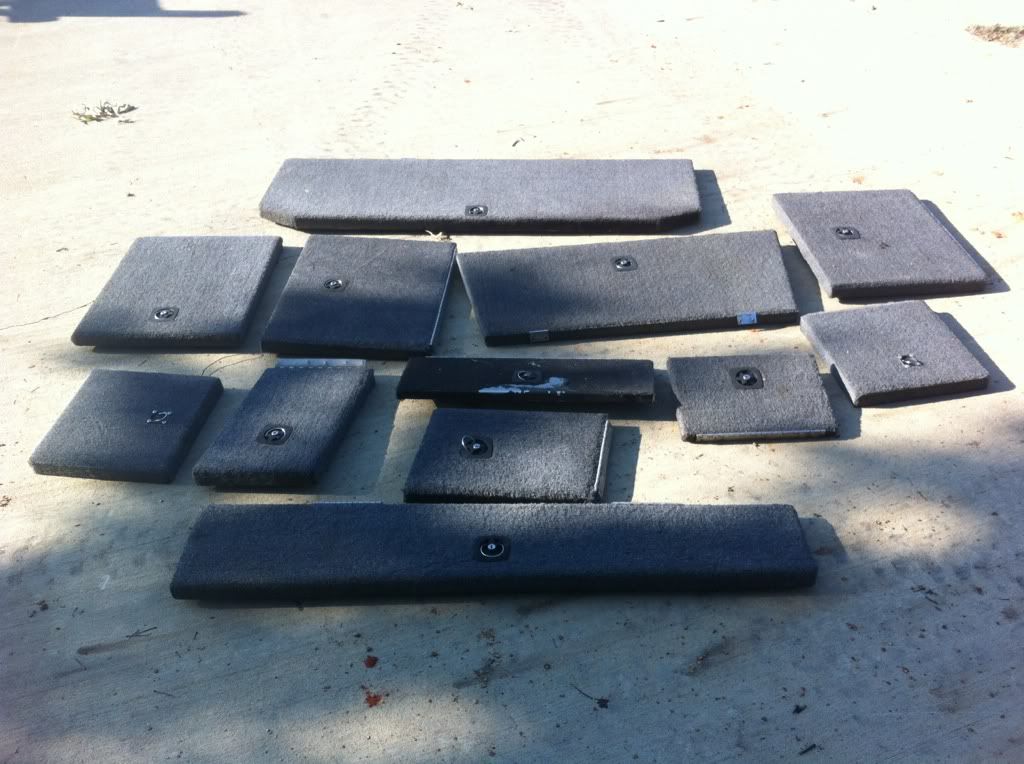
The trolling motor both of my fish finders and all of those compartment lids. As always I welcome all of your advise.


 Reply With Quote