

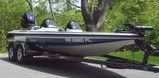
Thought Id post my trailer build for anyone considering a single to tandem conversion. To begin with, another BBC member here had one made (EZ loader) for his 191 a few years back. I contacted EZ Loader (since they have the specs to build without seeing it in person) and was told they did not have the time to do a one off. Too busy building other trailers for new boats, which I can understand in todays world. So I got a hold of the Phoenix dealership here and was referred to a business about an hour away. I had a conversation with them and was told starting price would be 8K (for a basic tandem) and up to 13K. They do make nice trailers and it would have been aluminum but no thanks.
So since Im the original owner of my boat/trailer/outboard .. I know the history. My existing Dri-Doc powder coated trailer is still in excellent shape for being 21 years old. Just mild surface rust in some areas. The benefit would be cost savings, dont have to get rid of this single axle trailer if I bought a new tandem, and the experience of actually doing the conversion. And I can build it how I want it.
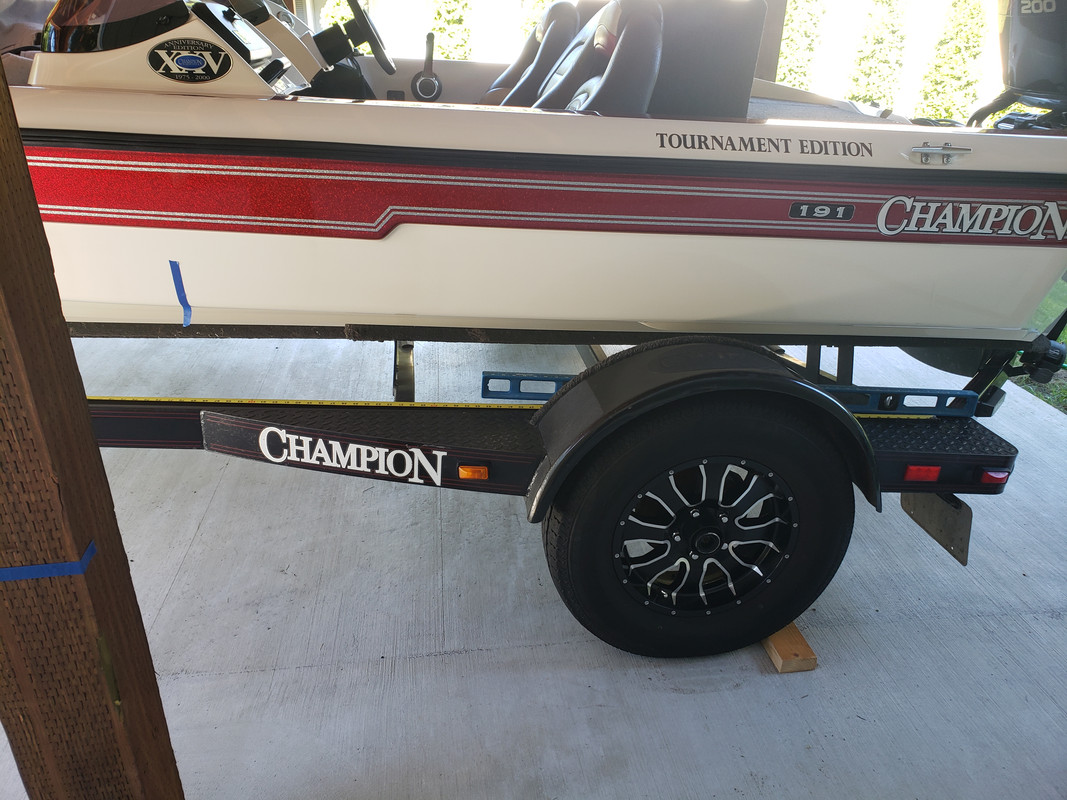
So I spent about two months planning. Looking at several photos of Champion boats, their trailers, how they sit (position of boat in relation to axle placement), what my hub face measurement on my existing axle is, how the hell am I gonna get my boat off the trailer, fender length and height based on the total length of the leaf springs (eye bolts) etc ..and was able to come up with a plan and get a rough idea of costs based on all the components I would need. Which are the following:
2 new 3500 lb. axles and one set of hubs (swapped my disc brakes and hubs from my existing axle), 4 1750 lb leaf springs, 2 complete sets of new bearings (inner and outer) and seals, 20 lug nuts, 6 trailer hangars, shackle kit with bolts, equalizers, 4 (weld on) axle spring seat brackets, 2 tandem axle fenders and one matching tire and wheel for a spare. I already had 4 of the same (wheels and tires), even though I had a single axle trailer. All those items came in at roughly $1700.00.
I started off by taking the boat off of the trailer. I have a buddy that lives on a lake and has his own launch. I put my boat in the water and slid it back about 18. Then I used my tow strap (and a chain) to secure the boat so it wouldnt fall off the back of the trailer as I drove it a couple hundred yards to where it would be sitting while I was doing the trailer conversion work. Then brought the tongue of the trailer all the way to the ground, which lifted the back end (transom) up. Built some cribbing blocks to slide under the transom. Then raised the tongue using the jack, which lowered the transom onto the blocks, lifting the transom off of the trailer. Then we used his excavator to lift the bow up, slide the trailer out and set it on some cribbing blocks. We used a memory foam mattress (that he was taking to the dump) to protect the underside of the boat.
Got the trailer home and started by unbolting my boarding steps at the bow and my spare tire carrier. Then onto cutting my front fender steps off on port and starboard sides along with both fenders. I left the rear steps in tact since I needed the tail lights to transport my boat to my nephews house, which is about 30 minutes away. Once there, we removed the axle, cut the existing axle hangars off, disconnected brake line, and grinded the chassis down smooth where the welds were.
We then welded the six hangars at our planned locations and mounted springs, equalizers, shackles, axles, brakes, hubs, and wheels. We also welded the spring seats to the axles once we had everything lined up 100% and welded the brake line holder to one of the axles. We then relocated and welded the front fender steps back to the trailer, obviously closer to the bow to allow for the tandem fenders. We also had to weld fender mounting plates to the fender steps since I wanted my fenders to be removable. We cut off about a foot of the rear step. This took some planning based on the fender height and length (tire clearance with no weight on the trailer).
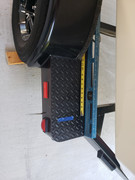
Once we did that, we built removable brackets to support the (middle) of the fenders. I didnt want to weld the fenders on just in case I ever needed to replace them. Plus, I wanted to have them powder coated to match the red color in my gel coat. So we welded two 3/8 inch bolts to each side of the chassis and two bolts to a plate that we welded to the underside of both fenders. This took a little bit of work, making sure the brackets would bolt up in the right locations. We also made 2 brackets to relocate my boat buckle/transom tie down straps.
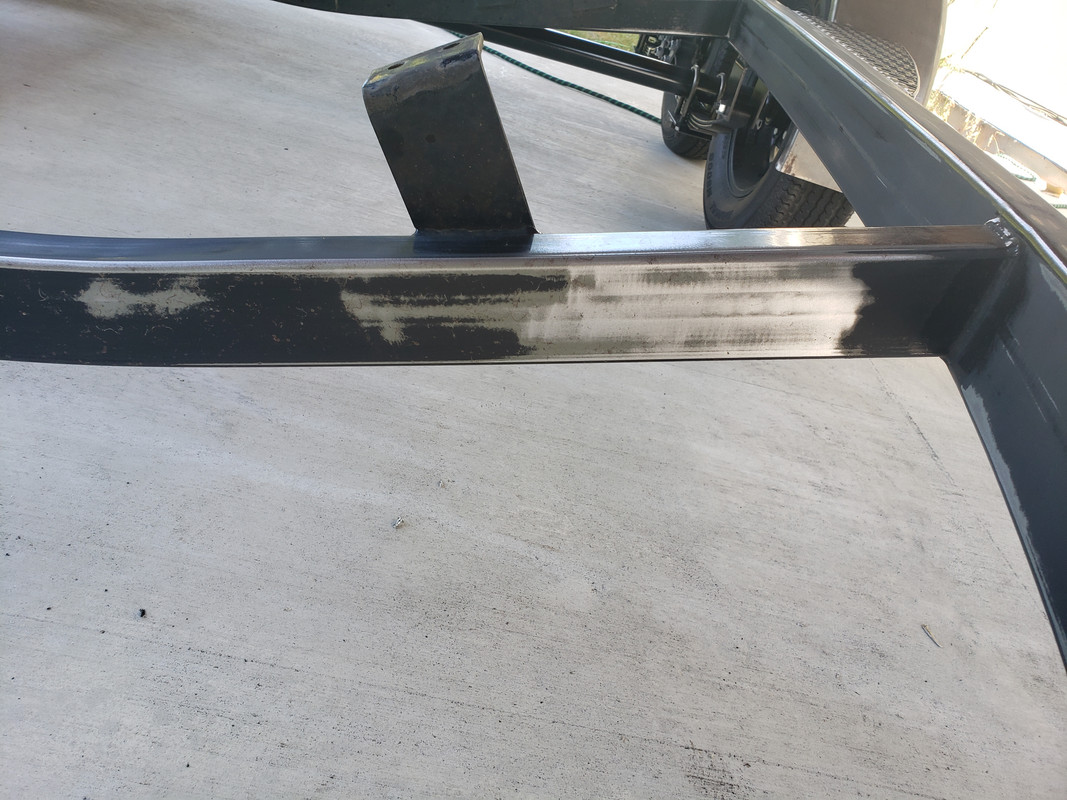
Then it was on to sanding the trailer down. I literally touched every inch of the trailer and spent about 20 hours sanding on it with 80 grit. Dropped it off at Linex for them to spray it and picked it up about 5 days later. I didnt have them Linex the tongue of the trailer, as I didnt want this to affect the ability for the swing away to function correctly. I painted it myself and painted the underside (of the tongue) with POR-15.
I then mocked up the fenders and drilled 2 holes on each side of each fender along with drilling holes thru the mounting plates we had welded to the fender steps. I used starboard as essentially a spacer/washer so the fenders and the steps do not actually touch each other. I also wanted them to look as they were floating between the steps. They are all bolted together with 8 stainless bots and nylock nuts as well as 16 stainless fender washers. I also built fender backing plates out of ½ wood and carpeted them after spraying them with 3 coats or Raptor Liner.
The fender brackets, bow steps and spare tire carrier were all sprayed in Raptor liner as well. Pretty awesome stuff, in my opinion.
I also rebuilt the 4 bunks, coated them in copper green and re carpeted them. Champion/Dri-Doc had a layer of carpet on the tops of each bunk and then carpet over that. So double padding. I duplicated exactly what they did, replacing all the hardware. Funny the bunks were still in awesome shape.
When remounting the boarding steps at the bow, I wrapped the frame of the trailer in Hydroturf to prevent the bolts from digging in to the Linex. When it came to the spare tire carrier, I shaved some of the material off from the inside of U-bolts so there were flat spots on each set of threads, since they would no longer fit because of the thicker Linex. I also wrapped the U-bolts in heat shrink to protect the Linex even further.
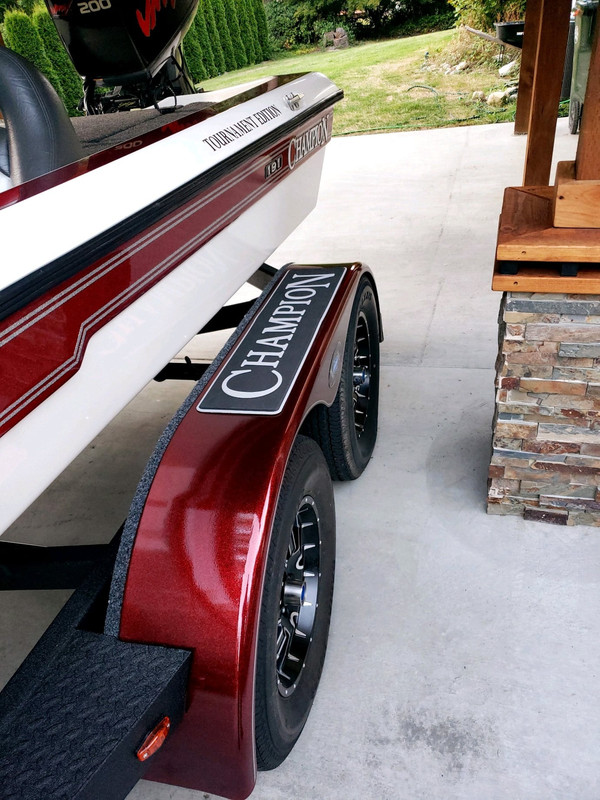
After getting the fenders back from the Powder coater, it was just a matter of getting them bolted up (again) and getting the fender backing plates bolted on. I also had some custom step pads made from www.Tnwraps.com that turned out awesome. I had two plates powder coated as well that I bolted to the trailer on each side. I slightly raised them because I thought it would look cool. The backing material is starboard. I also used starboard as kind of a spacer in between the fenders and the steps. Darryl from Iguana made me the domed emblems that say PDZ Fabrications on it. Its an homage to my nephew Preston Duman, who did all the fabrication work. He put some hours into it! I had a custom ALX Toadface made for him for doing the work since he wouldnt take any money from me. LOL! Couldnt have done it without him!
The last thing I did was rewire the entire trailer. All t-taps removed and everything soldered. I ended up adding more lights to it as well. Replaced the keel and bow roller with Stoltz rollers. So all bolts, screws, nuts and wiring are brand new.
Sorry so long winded and Im sure I left a bunch out but hopefully it helps someone if they are thinking about doing the same thing!
picture host
picture hosting
free online image hosting


 Reply With Quote


 Thanks for all the pictures.

 I learned a lot about trailers in doing this conversion. One of them being that there's not a whole lot to them!


